All Categories
Featured
Table of Contents
- – Rv Electrical Repair Atwood, CA
- – OCRV Center
- – Rv Blinds Repair Atwood, CA
- – Rv Repair Near Me Atwood, CA
- – Rv Furnace Repair Near Me Atwood, CA
- – Rv Aluminum Siding Repair Atwood, CA
- – Recreational Vehicle Repair Atwood, CA
- – Rv Ac Repair Near Me Atwood, CA
- – Local Rv Repair Atwood, CA
- – Local Rv Repair Atwood, CA
- – Motorhome Repair Shops Near Me Atwood, CA
- – Rv Water Damage Repair Atwood, CA
- – Rv Repair Shop Atwood, CA
- – Motorhome Roof Repair Atwood, CA
- – Rv Fridge Repair Near Me Atwood, CA
- – OCRV Center
Rv Electrical Repair Atwood, CA
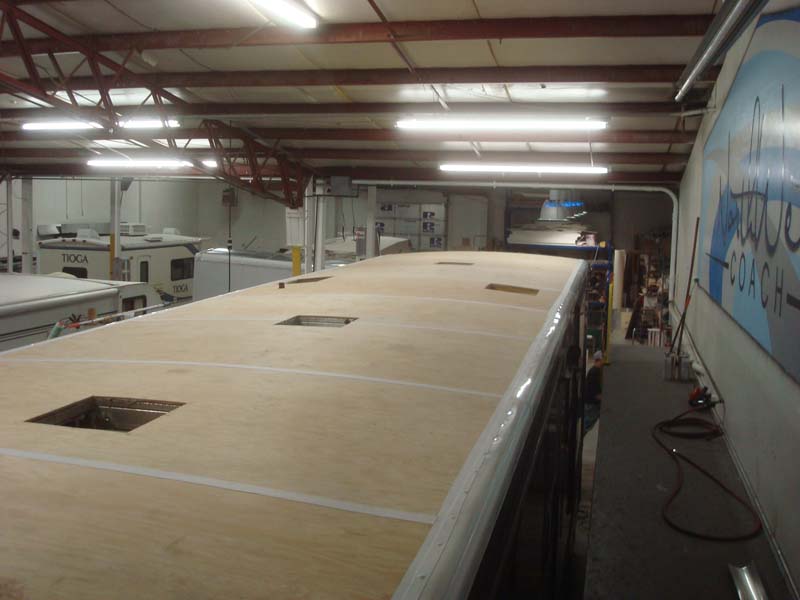
Leakages or damage to the inside of a recreational vehicle due to trapped wetness prevail problems. The roofing system of a recreational vehicle is one of its most vital elements, and as long as it continues to be intact, it can hold up against rough weather. Those roofings do not remain intact for life; since of certain exterior forces, such as time, tear, sun, and very harsh weather condition conditions, the roofing systems may obtain damaged.
To assist with that, you have actually found the ideal overview, which offers information about tools, methods, and pointers that can assist in executing RV roofing repair work, potentially conserving money on future fixings. Among the major factors for replacing a recreational vehicle roofing system is the defense it supplies versus water-related issues, as well as stopping damage from sunlight and other vital components.
Rv Blinds Repair Atwood, CA
A lot of the repair work, if seen in their early stages, can be attended to with very basic and basic tools in addition to standard instruction. Prior to starting the job, these are the listing of products and devices that need to be brought together.: To clean up the surface area before making fixings.
: For security while managing materials.: A top quality sealer designed for your kind of motor home roof (EPDM, TPO, or fiberglass).: To use the sealer smoothly and evenly.: For fixing larger holes or harmed areas.: To apply sealer in difficult-to-reach areas.: To cleanse the surface before applying any type of fixings.
Rv Repair Near Me Atwood, CA
When you have these devices in hand, you can go in advance and begin fixing your RV roof covering. The very first action out of commission your recreational vehicle roof covering is conducting a detailed evaluation. Look for indications of damage, consisting of:: Common in older Recreational vehicles or those exposed to extreme climate conditions.: Water spots on the ceiling inside the RV indicate roof covering leaks.
Make certain to examine all the joints, vents, and all other accessories on the roof covering to see if they are excellent. Any problems you may locate while the evaluation ought to be noted to ensure that you can address them when you begin the repair work. The initial point that requires focus is cleansing the recreational vehicle roof covering prior to making any kind of fixings.
Gently scrub the area with a RV roofing cleaner and a rubbing brush. Allow the roof completely dry prior to any kind of repair services are done. In instance of tiny fractures and leakages, use a top quality RV rooftop sealer which can permeate deeper and might assist to restore any other splits from appearing.
Making use of a caulking gun, dispel the split filler and silence any type of voids by broadening this sealant as much as the crack and past if essential. With the help of a putty knife, scrape the sealant to the location where the damages took place to make sure that the area is thoroughly secured. Sealant is efficient and reliable in tiny leakages and fractures but if there are big fractures and openings, after that a patch repair kit should be used instead.
Rv Furnace Repair Near Me Atwood, CA
Whatever that you would need to utilize for large amounts of damages is had within these sets. The very best strategy: Measure the broken location to reduce the spot product to dimension. Clean the broken area and permit it to dry. Apply adhesive around the damaged area and location the patch over it.
This method is good for patching moderate to big damages locations with durability. The seams are yet one more important variable that calls for consideration while making a RV roof covering repair work. Joints formed around vents, skylights, and all various other roof elements can compromise and, in time, establish leaks. These joints should additionally be caulked to enhance them and stop considerable leaks in the future.
Rv Aluminum Siding Repair Atwood, CA
Among the most crucial abilities you can understand for keeping your motor home is roof covering repair. It's easy to overlook damage to a motor home roof covering, yet it is just one of one of the most vital aspects of camper maintenance (Atwood Motorhome Mechanic Near Me). The majority of people that have been RVing for any type of size of time have actually become accustomed to the truth that they will need to do some repair and maintenance by themselves at some time
When it concerns holding off RV upkeep and repair, one of the worst points that can occur is water damage. When there's a concern with your roofing system, it happens quickly. Water damage can be prevented or lessened by fixing the leak on your own. In addition to that, there's a sense of achievement in doing points oneself.
Recreational Vehicle Repair Atwood, CA
These can degrade the roof product in time, damaging it. There are cleansers created specifically for motor home roof coverings and each kind of material. If you're servicing a broad area, tape off the remainder of your recreational vehicle and cover it with plastic to avoid roofing cleansers or sealers from leaking down the sides.
An additional thing that all RV roofing systems have in usual is the kind of fixings that they can need - Atwood Motorhome Mechanic Near Me. The sealer, joints, and spot holes and splits are the 3 items you might heal. If your EPDM or TPO rubber roof appears to be flaky or milky, a fresh layer of sealer is what it needs
Rv Ac Repair Near Me Atwood, CA
When buying the rubber roofing system layers or sealers, keep your recreational vehicle's dimensions in mind to ensure you get the appropriate amount. After washing the whole roof covering and allowing it to completely dry, use a layer of paint to the roofing system utilizing a roller. See to it to check out and adhere to the guidelines on the sealer package for ideal prep work.
A spot will certainly be called for if you find a little leak or tear on your RV roof. The good news is, manufacturers have actually produced repairs and motor home roof adhesives that are easy to apply and lasting. Most spots require little preparation various other than cleansing the damaged area and applying the patch over it, similar to a band-aid.
Local Rv Repair Atwood, CA
Fiberglass roofings' leading layer, like recreational vehicle rubber roofings', can oxidize with time, providing a half-cracked, chalky look. Scratch off any kind of loose, curled parts of the finish before cleansing and sand the roof's surface using fine to tool grit sandpaper after that. The finish will stick much better to a somewhat abraded surface area.
After the location has been smoothed and cleaned up, add fiberglass spots and adhesive layer by layer, as guided by the repair work set. At the end, coat your motor home with a sealer to the job and refinish the area as required. The resealing of light weight aluminum and various other steel RV roofs is performed with a certain finishing made for a light weight aluminum roof covering material.
The most convenient technique to fix a steel roof covering with more major damage is to change the steel panel, which is a treatment that might differ based on your recreational vehicle. You may be able to repair your metal roof utilizing a peel-and-stick patch depending on the level of the damages. Make sure you select one that is especially planned for steel roof coverings, as the sticky chemistry differs.
Local Rv Repair Atwood, CA
The appeal of a recreational vehicle is that it allows you live a life ofadventure and freedom. But experience and liberty just last while your roofdoes. And with a fiberglass roof, RV roof repair and maintenance can seemdifficult and made complex. That's why we've put together this list of top RVfiberglass roof covering fixing tips.
Assume of it as anyother product. Your Motor home fiberglass roof repairwill be much less complicated if you maintain the following in mind as you work: The same is real of rubber roofings.
Motorhome Repair Shops Near Me Atwood, CA
You simply do not have a complete feeling of the top quality of your fiberglass unless youcan see it from the top. Do not wait for your Motor home to start leakingit's muchbetter to catch problems early on. Make certain that you utilize this type of sealer to guarantee that you getthe proper bonding and treating.
If you have an R.V. after that you are probably cognizant of just how essential it is to preserve the roof on your recreational vehicle. This DIY recreational vehicle roofing repair overview below will aid you learn more about a few of the very best ideas for repairing and coating your motor home's rubber roofing to ensure that it lasts as lengthy as feasible and conserving you costly RV roof repairs in the future.
Rv Water Damage Repair Atwood, CA
See to it tape is covering up all parts of the fixing. Apply Challenging Repair finishing over the top of the tape repair task. Make certain you are covering around the tape by at the very least 3 to 6 inches. Enable Challenging Repair Coating to dry out for at least 4 hours prior to relocating to the next action.
roof a great scrub down with some power washing! This will certainly ensure that no dirt or gunk continues to be on your R.V.'s roof covering which can cause the new covering to not stick correctly. Prior to using layers it is necessary to eliminate any loose sealant around the R.V.'s vents and penetrations! If you do not do this then using brand-new Rv roofing securing can be difficult as there will already be a layer of R.V.
Tough Roof Covering Tape is a rubber roofing tape that complies with your surface and is 100% water resistant. The tape has a fabric mesh that layers can be put on to create a 100% water resistant membrane to your motor home roofing. Apply Tough Repair coating over the top of the tape repair work.
Rv Repair Shop Atwood, CA
Make certain to cover the tape and the surface area around the tape up to 3 to 6 inches to ensure complete waterproofing When R.V.'s are made they generally make use of silicone sealer which which sticks inadequately and eventually cause peeling off and cracking causing damages or water to enter. While it does assist protect your R.V.'s roofing system and infiltrations from the elements most recreational vehicle repair work originate from utilizing this kind of layer to seal your recreational vehicle roof.
or a new one then you may intend to make certain its closed properly with a strong recreational vehicle's finishing. When motor home roofing system repair work is completed around the whole R.V.'s roofing system it is essential to ensure you use a really solid RV sealant that can stand up under all kinds of climate condition! The R.V.'s roof covering can take a whipping in time which is why it's essential to use the very best Motor home sealer brand! Leading RV Sealer Brands To Take Into Consideration When Fixing Your R.V.
Its has rust and mold and mildew inhibitors in addition to is 86% reflective to sunlight. Prior to sealing and layer R.V.'s with TOUGH ROOF RV is essential to tape off around the border of your R.V.'s roofing system so you don't get sealant on any other component! This can be finished with painters tape or duck brand name 38806 motor home safe masking faucet.
If your recreational vehicle is brand-new or old then you must take into consideration sealing up any kind of leakages with Challenging Roof motor home Covering before water damage makes it a lot more costly! We advise you check out our difficult ROOF COVERING RECREATIONAL VEHICLE SETS and some of our guide videos that clarify this more comprehensive. If your looking for the very best RV Rubber Roofing Covering or Sealant after that you located it.
Motorhome Roof Repair Atwood, CA
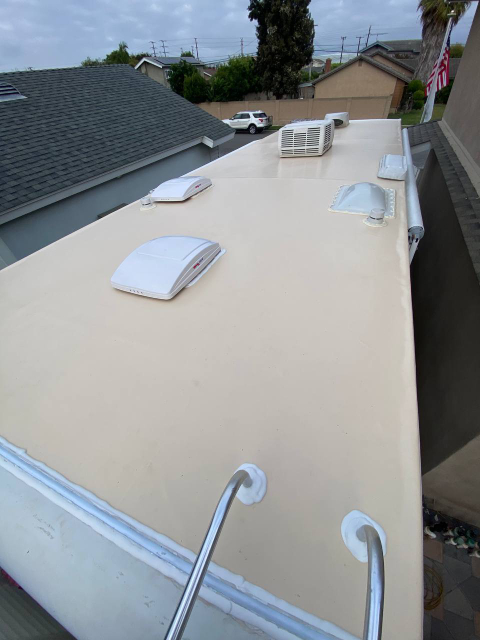
When you desire to make your recreational vehicle genuinely a home from home, you're going to require a roof that's every bit comparable to the roofing on your regular home. Commonly, this means going with a rubber roof that offers excellent insulation versus all the outside aspects like wind and rain.
Tough Roof Tape is a rubber roofing system tape that follows your surface area and is 100% water-proof. The tape has a textile mesh that finishes can be put on to create a 100% waterproof membrane to your recreational vehicle roofing. Use Difficult Repair coating over the top of the tape fixing job.
Make certain to cover the tape and the surface around the tape up to 3 to 6 inches to ensure total waterproofing When R.V.'s are made they normally utilize silicone sealer which which adheres badly and eventually cause peeling off and breaking causing damages or water to get in. While it does help shield your R.V.'s roofing and infiltrations from the components most RV repair work originate from using this sort of coating to secure your recreational vehicle roof covering.
When Motor home roofing repair work is completed around the entire R.V.'s roof covering it's important to make certain you utilize a very strong Motor home sealant that can hold up under all kinds of weather condition problems! The R.V.'s roofing system can take a beating over time which is why it's essential to use the ideal Motor home sealer brand! Before securing and finish R.V.'s with Challenging ROOFING Recreational vehicle is important to tape off around the perimeter of your R.V.'s roofing system so you don't obtain sealer on any type of other component!
If your recreational vehicle is new or old after that you should think about sealing up any kind of leakages with Difficult Roof covering RV Finish prior to water damages makes it extra costly! We recommend you checkout our challenging ROOF RV KITS and some of our tutorial videos that describe this more extensive. If your looking for the most effective recreational vehicle Rubber Roof covering Finishing or Sealer then you discovered it.
Rv Fridge Repair Near Me Atwood, CA
OCRV Center
Address: 23281 La Palma Ave Yorba Linda, CA 92887Phone: (714) 909-1444
Email: [email protected]
OCRV Center
When you want to make your recreational vehicle absolutely a home from home, you're going to require a roofing system that's equally comparable to the roof covering on your typical property. Commonly, this implies choosing for a rubber roofing that supplies fantastic insulation versus all the outside components like wind and rainfall.
Rv Electrical Repair Near Me Atwood, CARv Refrigeration Repair Atwood, CA
Motorhome Mechanic Near Me Atwood, CA
Rv Repair Shop Atwood, CA
Rv Electrical Repair Near Me Atwood, CA
Motorhome Roof Repair Atwood, CA
Rv Refrigerator Repair Atwood, CA
Local Rv Repair Atwood, CA
Rv Awning Repair Atwood, CA
Rv Blinds Repair Atwood, CA
Rv Water Damage Repair Atwood, CA
Recreational Vehicle Repair Atwood, CA
Replacement Rv Awning Atwood, CA
Rv Refrigerator Repair Atwood, CA
Recreational Vehicle Repair Atwood, CA
Rv Specialists Atwood, CA
Repair Rv Atwood, CA
Rv Repair Reviews Atwood, CA
Rv Awning Fabric Repair Atwood, CA
Rv Electrical Repair Atwood, CA
Rv Awning Repair Atwood, CA
Replacement Rv Awning Atwood, CA
Local Rv Repair Atwood, CA
Rv Repair Reviews Atwood, CA
Repair Rv Awning Atwood, CA
Rv Ac Repair Near Me Atwood, CA
Recreational Vehicle Repair Atwood, CA
Replacement Rv Awning Atwood, CA
Rv Furnace Troubleshooting Atwood, CA
Rv Awning Repair Atwood, CA
The Rv Repair Centre Atwood, CA
Rv Electrical Repair Near Me Atwood, CA
The Rv Repair Centre Atwood, CA
Rv Furnace Repair Near Me Atwood, CA
Rv Repair Near Me Atwood, CA
Rv Refrigerator Repair Atwood, CA
Rv Awning Repair Atwood, CA
Rv Electrical Repair Atwood, CA
Rv Furnace Repair Near Me Atwood, CA
Rv Awning Fabric Repair Atwood, CA
Rv Ac Repair Near Me Atwood, CA
Rv Awning Repair Near Me Atwood, CA
Rv Aluminum Siding Repair Atwood, CA
Rv Awning Fabric Repair Atwood, CA
Rv Aluminum Siding Repair Atwood, CA
Motorhome Mechanic Near Me Atwood, CA
Rv Refrigerator Repair Atwood, CA
Rv Blinds Repair Atwood, CA
Motorhome Roof Repair Atwood, CA
Rv Repair Shop Atwood, CA
Rv Furnace Repair Near Me Atwood, CA
Awning Repair Rv Atwood, CA
Rv Electrical Repair Near Me Atwood, CA
Rv Awning Repair Atwood, CA
Rv Refrigerator Repair Atwood, CA
Motorhome Roof Repair Atwood, CA
Rv Aluminum Siding Repair Atwood, CA
Rv Fridge Repair Near Me Atwood, CA
Rv Water Damage Repair Atwood, CA
Rv Furnace Repair Atwood, CA
Motorhome Mechanic Near Me Atwood, CA
The Rv Repair Centre Atwood, CA
Rv Refrigeration Repair Atwood, CA
Awning Repair Rv Atwood, CA
Rv Blinds Repair Atwood, CA
Rv Blinds Repair Atwood, CA
Motorhome Mechanic Near Me Atwood, CA
Repair Rv Awning Atwood, CA
Rv Blinds Repair Atwood, CA
Rv Furnace Repair Atwood, CA
Rv Ac Repair Near Me Atwood, CA
Rv Awning Repair Atwood, CA
Rv Furnace Repair Near Me Atwood, CA
Rv Repair Near Me Atwood, CA
Rv Aluminum Siding Repair Atwood, CA
Rv Repair Near Me Atwood, CA
Rv Electrical Repair Near Me Atwood, CA
Rv Awning Repair Atwood, CA
Near Seo Optimization Atwood, CA
Near Here Seo Services For Small Business Atwood, CA
OCRV Center
Table of Contents
- – Rv Electrical Repair Atwood, CA
- – OCRV Center
- – Rv Blinds Repair Atwood, CA
- – Rv Repair Near Me Atwood, CA
- – Rv Furnace Repair Near Me Atwood, CA
- – Rv Aluminum Siding Repair Atwood, CA
- – Recreational Vehicle Repair Atwood, CA
- – Rv Ac Repair Near Me Atwood, CA
- – Local Rv Repair Atwood, CA
- – Local Rv Repair Atwood, CA
- – Motorhome Repair Shops Near Me Atwood, CA
- – Rv Water Damage Repair Atwood, CA
- – Rv Repair Shop Atwood, CA
- – Motorhome Roof Repair Atwood, CA
- – Rv Fridge Repair Near Me Atwood, CA
- – OCRV Center
Latest Posts
Fullerton Best Senior Medical Insurance
Local Payroll Services Stanton
Evaporative Cooler Installation Alhambra
More
Latest Posts
Fullerton Best Senior Medical Insurance
Local Payroll Services Stanton
Evaporative Cooler Installation Alhambra