All Categories
Featured
Table of Contents
- – Rv Carpet Replacement Villa Park, CA
- – OCRV Center
- – Rv Interior Furniture Villa Park, CA
- – Awnings For Rv Villa Park, CA
- – Rv Refrigerator Replacement Villa Park, CA
- – Rv Upholstery Villa Park, CA
- – Replacement Windows For Campers Villa Park, CA
- – Rv Interior Furniture Villa Park, CA
- – Awnings For Rv Villa Park, CA
- – Rv Floor Replacement Villa Park, CA
- – Rv Refrigerator Replacement Villa Park, CA
- – Rv Chairs Villa Park, CA
- – Replace Rv Flooring Villa Park, CA
- – Awnings For Trailers Villa Park, CA
- – OCRV Center
Rv Carpet Replacement Villa Park, CA
A major advantage to GCI Outdoor is that they have a 1 year service warranty on their chairs. This is substantial for us. We utilize our chairs all the time, and they are out in all type of weather condition, so we enjoy knowing that we are covered if anything happens to them.
I'm going to discuss some of the attributes of each chair we've possessed so you can make an informed decision regarding which one would be the most effective fit for YOU!.
I am basing our service on several others that state they are great and I have actually not seen one issue regarding them. This fact contrasts to a virtually uncountable number of grievances regarding the recliners (I make use of that word freely).
It just is so incorrect. I understand with various other things, like television, we would go to the manufacturer for resolution. In this instance, Heartland established the specifications and selected a vendor to meet those specs so I think they must participate in a solution.
Rv Interior Furniture Villa Park, CA
Maybe that's the strategy, I will certainly simply provide up and go away. Not all set to throw in the towel. I'm amazed that with all the complaints, Heartland isn't throughout this since it's been taking place for a lengthy time. All the advertising and marketing they do is absolutely jeopardized by a substandard product creating a lot of grievances.
The wide array of outside chairs available makes sure that there will be one to fit your needs and design. There are many models of exterior foldable reclining chairs, including the Absolutely no Gravity collection which supports you while being extremely light-weight. The Picnic Time Chairs are excellent if you intend to maintain accessories or other products, such as beverages or sunglasses, nearby.
Awnings For Rv Villa Park, CA
When picking chairs or any type of various other type of exterior recreational vehicle furniture, it is necessary to maintain in mind the number of individuals present and the preferences they may have. The readily available storage area is likewise good to think about, as various sorts of chairs will certainly fold or collapse to varying sizes.
While most chairs can lug larger loads than they market, their lifetime will be greatly decreased. And no person wishes to be the one to come down on the ground if a chair falls short and damages. Some chairs might be as well tiny or even also large, making it a good idea to consider the measurements for the chairs readily available.
As a result of the limited space that you have readily available inside of your RV, you have to select chairs that can be folded up to a portable size to properly fit your designated storage space. While some outside chairs are extremely comfortable and can endure the exterior components, they may still be fairly big when folded down.
Some outdoor chairs also come with a carrying bag, making it even much easier to keep the chairs out of the method when not in use. Thinking about the cost of the chairs that you're interested in can help ensure that you make a wise purchase. Depending upon the number of chairs that you need, you can be spending numerous dollars on these chairs.
Rv Refrigerator Replacement Villa Park, CA
For support when purchasing chairs to bring along in your RV or any type of other RV-related questions, please contact us. Outdoor Chairs Related Articles.
I hear you, Dan, we are taking a danger. I am basing our solution on several others that claim they are excellent and I have not seen one problem about them. This truth contrasts to an almost vast number of problems concerning the recliner chairs (I use that word loosely). At the very least it's worth a try before we pay out an additional huge quantity for our very own seats enjoyment.
Rv Upholstery Villa Park, CA
We are additionally worried regarding matching the leather. Thanks for your ideas (Rv Chairs Villa Park). I resemble Ange and starting to really feel like the "b" word on this concern. It just is so incorrect. I recognize with various other items, like television, we would certainly most likely to the maker for resolution. However in this instance, Heartland set the specifications and chosen a vendor to fulfill those specifications so I think they need to participate in a solution.
Possibly that's the method, I will just give up and vanish. Not prepared to step down yet. I'm surprised that with all the grievances, Heartland isn't all over this since it's been taking place for a very long time. All the advertising and marketing and advertising and marketing they do is definitely endangered by a substandard item creating numerous problems.
We obtained 2 of our dining-room chairs and changed with an ottoman. High adequate to rest at the table on, can store things under the cushion in package, and use it as a foot rest in front of the tacky Thomas Payne recliners.
Replacement Windows For Campers Villa Park, CA
A necessary component of this site could not load. This may result from a web browser extension, network concerns, or internet browser setups. Please examine your link, disable any type of ad blockers, or try utilizing a various browser.
Right here's a RV Do It Yourself tip to assist you secure your cost-free standing dinette chairs to see to it they stay put and don't bang right into anything during traveling. Over the previous summer, we purchased a 5th wheel that has a dining room with free-standing chairs. The previous owner (it's a 3 years of age rig) hadn't used it much and claimed he 'd never even seen any type of tie-down straps for the chairs.
Others report damages created by unprotected chairs throughout a panic-stop or crash. The photos reveal what we came up with: We leaned the chairs right into the table so that the chair backs touch the edge of the table, making sure the chair legs clear the wall and the couch.
We used 2 noodles. The pieces could now be slipped over the external stiles of the chair backs as revealed to supply cushioning between the table and the chairs.
Rv Interior Furniture Villa Park, CA
The sketch attempts to reveal the entire point from the top of the table. You can see how the Velcro band (in red) runs around the backs of of the chairs, then under the table and around the center pedestal. There's one more band for the other pair of chairs, yet I just revealed one for clearness.
We 'd recommend you see to it that side is the one that comes in call with the table and chairs so there is no scraping of the surfaces. Lastly, adding a brief strap at the top of each pair of chairs, as shown in the last photo, made every little thing extremely steady and secure.
We determined to do it and we wanted something that would work and would certainly be affordable and rather easy to make use of. Both noodles and the Velcro bands cost us much less than $30 and every little thing is lightweight and recyclable. While you do need to creep under the table a bit to put the straps on, it's rather simple.
Awnings For Rv Villa Park, CA
Currently, honestly, I have not tried it yet, however it looks excellent, obtains excellent reviews and it would certainly be a lot quicker to protect the chairs than using the noodles and Velcro bands. I don't know that it would certainly be any kind of extra reliable, however definitely easier and no bother with where to keep the noodles and bands.
The bracket installs on the table's center post and the hold-down bars fold up versus the under side of the table when not in use - Rv Chairs Villa Park.
I'm beginning to assume these foam noodles may sign up with good ol' duct tape in the "do not leave home without it" group. We 'd like to hear just how you secure points for travel. What has worked for you? What hasn't? Leave a comment.
We're here to assist you make the many of your time. Whether you're intending an outdoor camping journey or a celebration, we have a vast variety of camping tools, video games, watercrafts, and areas to assist make your job a lot easier.
Rv Floor Replacement Villa Park, CA
System spirits funds can be utilized at the. The center likewise provides both lengthy and temporary vehicle/RV storage space and mini storage space units. Cars are stored with a variety of options and cost ranges with controlled, restricted gain access to for your property defense. Our services are open to the public. Product Expense Mini Storage Space (5' x 9') $45/month Back-In $45/month Pull-Thru $55/month Covered Space $65/month Medication Creek RV Park lies close to Ft Sill Golf Club.
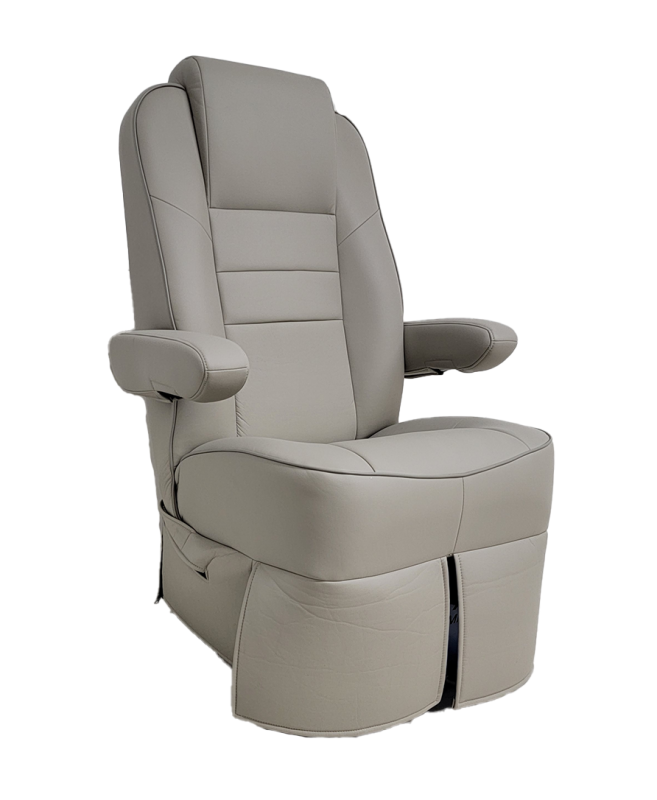
As a momentary comfort solution, I acquired seat covers at Walmart. I measured my Ford seats width from arm rest to arm remainder at 26".
Rv Refrigerator Replacement Villa Park, CA
The very first 2 DE Leon seats are 26" yet the Venture seat # 5 is 27". Click on each seat and scroll down to see the measurements and color/other alternatives like warmth, back etc.
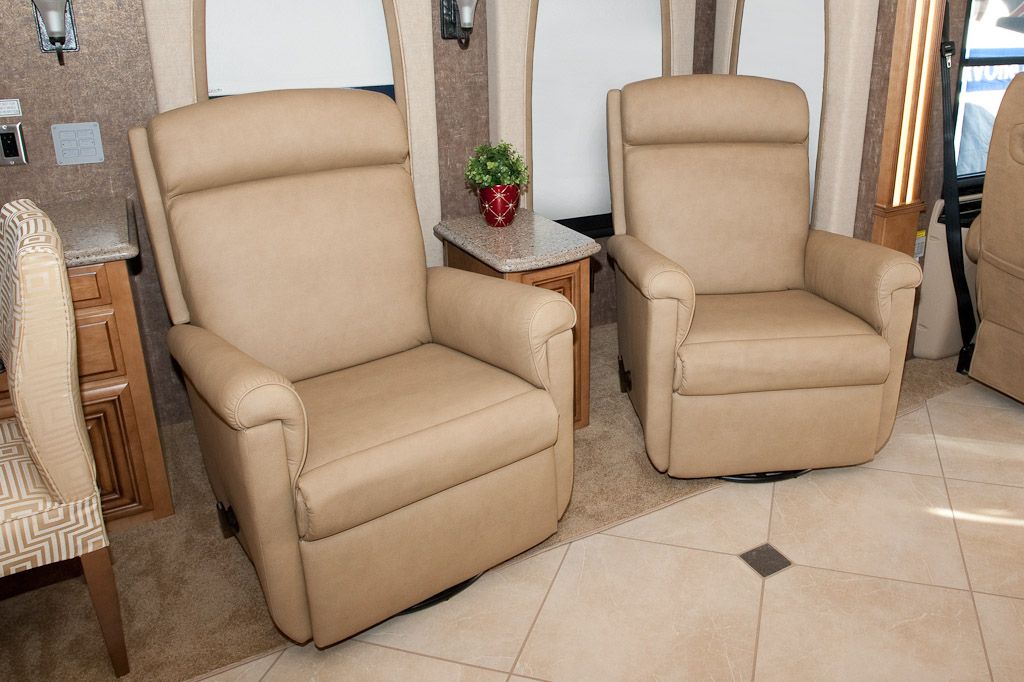
Reclining chairs made for Recreational vehicles are additionally generally comprised of two or 3 different items, which makes them less complicated to bring right into your recreational vehicle. After setting up, these recliners are protected to the real camper, so they won't move or damage the interior when traveling. Several of one of the most popular sorts of motor home recliner chairs are Swivel Rockers, Euro Recliners and Wall Surface Huggers.
Likewise referred to as a zero-wall reclining chair, a wall surface hugger reclining chair needs extremely little wall clearance to recline. Some RV wall surface hugger recliners, like the ones from Lambright, require just 3 inches of wall surface clearance. These motor home chairs recline with simply a couple of inches of clearance since as the back of the chair drops, the seat moves on.
Motor home theater seating and couches can come furnished with this attribute too.
Rv Chairs Villa Park, CA
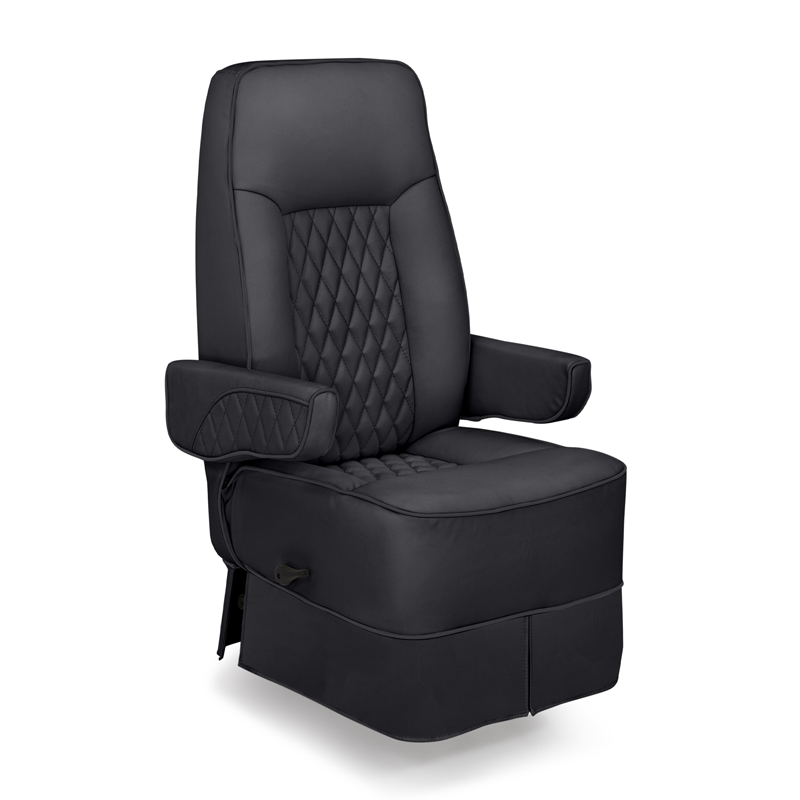
Our premium Lambright Comfort Chairs are ideal for your RV. Lambright is a brand name dedicated to craftmanship and convenience while still using you a fashionable appearance and space conserving technology so you can obtain one of the most out of your money. At Bradd and Hall, we use a vast array of Lambright options so we recognize there will be something perfect for you.
If you are looking for a couch, you can check out our Lambright Sofa Sleeper or maybe the Lambright Harrison Reclining Couch. Lambright additionally has premium movie theater seating ideal for the motion picture fan on the go.
The center also offers both long and short-term vehicle/RV storage space and mini storage space systems. Thing Price Mini Storage Space (5' x 9') $45/month Back-In $45/month Pull-Thru $55/month Covered Area $65/month Medicine Creek Recreational vehicle Park is located close to Fort Sill Golf Club.
As a short-term convenience fix, I bought seat covers at Walmart. They hold the gel pads in position without any movement, they sit tight. I determined my Ford seats size from arm remainder to arm rest at 26". I have observed in the 'shop4seats' website that some seats are 27" wide at the same spot.
Replace Rv Flooring Villa Park, CA
The very first 2 DE Leon seats are 26" however the Venture seat # 5 is 27". Click on each seat and scroll to watch the measurements and color/other choices like warmth, lumbar etc. This business provides bases too. I'm going to get a traveler swivel base.
Reclining chairs made for RVs are also typically made up of 2 or 3 separate pieces, that makes them less complicated to lug right into your motor home. After assembly, these recliners are safeguarded to the actual camper, so they will not walk around or damage the interior when traveling. Several of one of the most popular sorts of motor home recliners are Swivel Rockers, Euro Recliners and Wall Huggers.
, need as little as three inches of wall surface clearance. These Recreational vehicle chairs recline with simply a couple of inches of clearance since as the back of the chair goes down, the seat moves onward.
Motor home cinema seating and sofas can come equipped with this function.
Awnings For Trailers Villa Park, CA
Our top notch Lambright Comfort Chairs are ideal for your RV. Lambright is a brand name committed to craftmanship and convenience while still offering you a stylish look and area conserving innovation so you can obtain one of the most out of your cash. At Bradd and Hall, we offer a variety of Lambright alternatives so we understand there will certainly be something perfect for you.
OCRV Center
Address: 23281 La Palma Ave Yorba Linda, CA 92887Phone: (714) 909-1444
Email: [email protected]
OCRV Center
If you are seeking a sofa, you can take a look at our Lambright Couch Sleeper or perhaps the Lambright Harrison Reclining Couch. Desiring to loosen up in convenience? Lambright additionally has premium cinema seating ideal for the motion picture fan on the move. With such a vast variety to choose from, you might have some concerns.
Rv Couch Villa Park, CAReplacement Rv Refrigerator Villa Park, CA
Rv Carpet Replacement Villa Park, CA
Rv Couch Villa Park, CA
Awning Installation Villa Park, CA
Awnings For Trailers Villa Park, CA
Awnings For Rv Villa Park, CA
Rv Interior Remodel Villa Park, CA
Rv Carpet Replacement Villa Park, CA
Rv Sofa Beds Villa Park, CA
Replacement Windows For Rv Villa Park, CA
Awnings For Rv Villa Park, CA
Rv Couch Bed Villa Park, CA
Replacement Rv Windows Villa Park, CA
Rv Dinette Table Villa Park, CA
Rv Interior Remodel Villa Park, CA
Rv Dinette Booth Villa Park, CA
Rv Dinette Table Villa Park, CA
Rv Carpet Installation Villa Park, CA
Rv Sofa Beds Villa Park, CA
Rv Couch Bed Villa Park, CA
Rv Interior Furniture Villa Park, CA
Rv Sofa Beds Villa Park, CA
Rv Upholstery Villa Park, CA
Awning Installation Villa Park, CA
Rv Couch Villa Park, CA
Rv Dinette Table Villa Park, CA
Rv Carpet Replacement Villa Park, CA
Rv Carpet Installation Villa Park, CA
Rv Sofa Sleeper Villa Park, CA
Rv Dinette Table Villa Park, CA
Rv Sofas Villa Park, CA
Rv Couch Bed Villa Park, CA
Rv Couch Bed Villa Park, CA
Rv Replacement Awnings Villa Park, CA
Awnings For Trailers Villa Park, CA
Rv Microwave Replacement Villa Park, CA
Rv Sofa Beds Villa Park, CA
Rv Chairs Villa Park, CA
Rv Interior Furniture Villa Park, CA
Rv Dinette Table Villa Park, CA
Rv Replacement Furniture Villa Park, CA
Replacement Rv Windows Villa Park, CA
Rv Carpet Installation Villa Park, CA
Replacement Windows For Rv Villa Park, CA
Rv Replacement Furniture Villa Park, CA
Rv Dinette Booth Villa Park, CA
Rv Dinette Booth Villa Park, CA
Rv Floor Replacement Villa Park, CA
Remodeling Rv Villa Park, CA
Rv Dining Table Villa Park, CA
Rv Chairs Villa Park, CA
Rv Replacement Awnings Villa Park, CA
Rv Restoration Companies Villa Park, CA
Rv Couch Villa Park, CA
Motorhome Carpets Villa Park, CA
Rv Replacement Furniture Villa Park, CA
Replacement Rv Refrigerator Villa Park, CA
Rv Couch Bed Villa Park, CA
Awnings For Trailers Villa Park, CA
Replacement Windows For Rv Villa Park, CA
Rv Couch Bed Villa Park, CA
Awnings For Trailers Villa Park, CA
Rv Replacement Furniture Villa Park, CA
Rv Carpet Installation Villa Park, CA
Rv Carpet Replacement Villa Park, CA
Rv Upholstery Villa Park, CA
Awnings For Rv Villa Park, CA
Rv Dinette Booth Villa Park, CA
Rv Couch Villa Park, CA
Rv Restoration Companies Villa Park, CA
Replacement Rv Refrigerator Villa Park, CA
Awnings For Trailers Villa Park, CA
Awnings For Rv Villa Park, CA
Rv Upholstery Villa Park, CA
Rv Couch Villa Park, CA
Replace Rv Flooring Villa Park, CA
Rv Dining Table Villa Park, CA
In Seo Consultant Villa Park, CA
Affordable Seo Specialist Villa Park, CA
OCRV Center
Table of Contents
- – Rv Carpet Replacement Villa Park, CA
- – OCRV Center
- – Rv Interior Furniture Villa Park, CA
- – Awnings For Rv Villa Park, CA
- – Rv Refrigerator Replacement Villa Park, CA
- – Rv Upholstery Villa Park, CA
- – Replacement Windows For Campers Villa Park, CA
- – Rv Interior Furniture Villa Park, CA
- – Awnings For Rv Villa Park, CA
- – Rv Floor Replacement Villa Park, CA
- – Rv Refrigerator Replacement Villa Park, CA
- – Rv Chairs Villa Park, CA
- – Replace Rv Flooring Villa Park, CA
- – Awnings For Trailers Villa Park, CA
- – OCRV Center
Latest Posts
Fleet Maintenance Service Anaheim
Placentia Motorhome Refrigerator Repair
Rv Slide Out Roof Repair Brea
More
Latest Posts
Fleet Maintenance Service Anaheim
Placentia Motorhome Refrigerator Repair
Rv Slide Out Roof Repair Brea